Tuesday 30 September 2008

Showing off The Stash

I've been inspired by the lurvely Curlypops and Mikes to show off my stash. My fabric stash that is.
It's a very important little collection of mine.
Sometimes it bamboozles me.
Sometimes it embarrasses me.
Sometimes I like sorting it all out and getting inspired.

But most of all I like using it to create all sorts of delicious things. So here goes!

First off we have the top shelf - home of retro prints, 40's styles, black and whites, and some misplaced stripes.

Photobucket

Next shelf down, we have fruits and florals, kids prints, and spots.

Photobucket

Next shelf down we have plains and ginghams. Now why are there spots down there.....?

Photobucket

And last shelf, the bottom, displays a bit of bottom shelf neglect. Least used fabrics and a bit of a mish-mash... Vintage and new flannel, wool felt, half finished quilt, tops waiting for upcycling...

Photobucket

Oh and there's this of course.... this last pic is my scraps bag, I just can't bear to part with even the littlest pieces sometimes!

Photobucket

I'd love to embrace one of those fabric folding systems where you fold each piece of fabric round a piece of card so that they all look noice and the same size when folded. But what the heck do you do with all the odd shaped used pieces that just won't cooperate?? LOL
Ah, enough of my stash. I love it. It loves me. Until I start cutting it! Thanks Curlypops and Mike for this great topic. :)

Hanging with the new peeps...

Photobucket

I've been finding time to knit little finger puppet people for my daughter to play with and use with her dolls house. Here are the first three that have been created with another on the way. The pattern is from Jean Greenhowe's Bazaar Knits. I also aim to make a little rabbit for the 'peeps' to have as company.... found the pattern here.

It really makes me giggle when I see myself knitting - I am such an awkward and hesitant knitter. But if the results are quick and easy like our new peeps above, I'll have a go at most anything!!

Friday 26 September 2008

Hats have landed...


I'm so very pleased to say that I have four new girl's hats in store at Silly Gilly right now.

Top left - Size Medium
Top right - Size Small
Bottom left - Size X-Large
Bottom right - Size Large

These hats fit girls ranging in age from 6 months through to 4 years. All are made from 100% cotton with satin ribbon and ready to make any little girl look splendiferously snappy for Spring!!
And I'm proud to say they have had my Mother's Group seal of approval!

Have a great weekend everyone!

Wednesday 24 September 2008

New Summer Hats coming to Silly Gilly soon!

I've been very lucky this week and had beautiful sun streaming into my studio, combined with the time and opportunity to sew like crazy! I am working very studiously on getting more summer hats ready for the Silly Gilly store. Here is a sneak peek of a couple of girls hats waiting for some final embellishments...

hat sneak peek

So I must off and keep up the hard work. Well, not before I show you a recent find at an op shop for my daughter. I'm thinking this little dress may have been made in the 60's. It's handmade and fits her perfectly at the moment, but not for long! Aren't the little dogs on the hemline just so cute! It's interspersed with little flower bunches and the smocking on the bodice is in great condition. I nearly fell over when I saw the price - $1. Have a great week all!

Twirly girl

Sunday 21 September 2008

Garage Sales and Apron Sneak Peek

I'm trying out some new layout styles with my blog, courtesy of a fantastic tutorial by Megan at My Everyday Chaos. She has a tutorial on how to change the size of your photos in blogger. It's such an easy to follow tute, and I'm enjoying the playing around.

Fabric

Above is a photo of some delicious fabrics I found at a garage sale this weekend. Left to right, some lovely heavy weight gingham, fantastically bright red floral which I think I'll use for a girls summer hat for the store, a light weight, slightly open weave fabric with a 40's style print of children playing and lastly, another fabulous 40's style print. Both the last two seem destined for skirts or summer tops.

And I was hideously decadent Friday night and kept working on my new apron.
Yes it is All. For. Me. Call me indulgent, selfish, plain outright crazy, but it's nice once in a while, when you sew for your business, to go silly and sew something that you will wear yourself. Have a sneaky look at how it's coming along...

Apron

The fabric I have used is by Anna Griffin and is called Elsie's Kitchen Pattern #24570. I loved the 50's look fabric as soon as I laid eyes on it. It definitely came under the category of impulse buy but I'm still smitten so I think that's ok! Paired with some nice cheap, reliable gingham from Spotlight and some vintage bias binding, it's coming together nicely. More photos soon!

Thursday 18 September 2008

Quiet corner


This photo was taken a little while ago and for some unbeknown reason, it really makes me a bit teary and misty eyed.
It's a little reading spot in my daughter's room. Ah, shucks....

Monday 15 September 2008

Ribbon label tutorial

I needed a cheaper alternative to having my product labels custom made in the form of woven labels. It just seemed that I was going through them at a rapid pace of knots, and working out at approx $34 for 50 labels, it was just not in my budget. I also wanted a graphic on my label and that would cost even more!

So ingenuity came to the fore and I realised I can make my own labels for less than $20. So here is the Silly Gilly tutorial on making your own custom ribbon labels.....

Materials required:
A4 plain paper
Iron-on T-Shirt Transfer paper
Ribbon (I use white 15mm wide double faced Satin ribbon)
Iron and ironing board
Scissors
Printer (I use an ink jet printer)
Computer with graphics program

Step 1:
Decide on the image you want on your label. Get handy with your computer and, using an image manipulation program (I use Photoshop) create a whole page full of your logo. I adapted my Silly Gilly store logo. I have created it so that it will be a horizontal label which is folded in half.

Step 2:
Repeat it in rows to fit across the page and space them so that each row has a small amount of space around it to enable easy cutting out. Make sure your images are printed on the page reverse. This enables the image to come out the right way on the label. Do a trial run with a plain piece of paper to ensure it fits and that the images are spaced correctly.

Step 3:
Load your printer with your chosen T-Shirt Transfer paper and print your images. I print my images with the printer set on 'Standard' print and on plain paper. You may have a setting for your printer for Transfer paper.

Cut out each image individually, ensuring the height of each image will fit onto the ribbon you will be using.


Step 4:
Following the instructions particular to your T-Shirt Transfer paper, lay the cut out printed images on the ribbon and iron. I allow a small amount of ribbon between each image so that there is a seam allowance when you come to attach the label.

Step 5:
Cut out each individual label and it's ready to use on your next project!!

My pack of T-Shirt Transfer paper contained 5 x A4 sheets and I can fit approx 270 labels on those 5 sheets. Which makes the labels a lot more cost effective than buying custom made woven labels.

My example above is shown with a fold in the center as I use these on side seams as shown in the following pictures:
Hopefully this tutorial will help you if you want to save a little bit of money and have an entirely unique option for labeling your wares. Please feel free to ask any questions as this is my first attempt at writing a tutorial! Good luck and I'd love to see some examples of your efforts.

Sunday 14 September 2008

Sunday afternoon sunshine

I got busy this afternoon with my camera. I'm trying to learn to use it properly instead of blaming it for not doing what I want it to do. One of the things I love about reading other people's blogs is that I get to see some inspirational photography and it motivates me to improve my own skills.

Here are some shots of this afternoon at our house....

Vintage Tupperware found at various garage sales

Camellia in the yard


Bit of still life in the kitchen

Happy coloured glass

Missy

Wednesday 10 September 2008

Organised happiness

Sometimes, maybe twice a month or so, I get overwhelming urges to tidy my studio. Cleanse the palate perhaps. Here is the result of last night's efforts:


Simple really but look at what a $2 purchase of a sectioned container at a cheap shop can do for organisation and clarity in my workspace. And I'm a big fan of rainbow colour groupings, so it makes my heart happy too.

And because I love reading others' little bits of inspiration and helpfulness, I've decided to share my way of making the labels that I use for my Silly Gilly products. It'll be my first tutorial, but hey, so many gals and blokes do it, it can't be all that hard?? So, tutorial on Silly Gilly style product labels, coming soon..........

Tuesday 9 September 2008

Expecting a major cupcake deluge at your place soon?

If you are, I have the perfect solution.

(photo courtesy of Apartment Therapy Re-Nest - How to make a vintage cake stand)

Make your own vintage cake stands!

I found this wonderful idea using op-shopped plates and glassware stuck together to create unique and very thrifty cake stands. Have a looksie here. It's a bit hard to see in the photo but essentially they have glued thrifted glasses to the bottom of thrifted plates. Genius for those who need a lot of cupcake storage all at the same time. Maybe a wedding, kids party?

The correct attire...

Apparently there is a certain outfit that you need to wear when you are doing the dishes... "in case the water wants to jump" according to my 2.5yr old. Sorry for the photo but I couldn't help but giggle when I saw this...


And of course this morning I consulted the oh-so-mysterious random number generator and.....


Drum Roll.......

Oh the suspense!!!........................ (can't you tell I lurve a bit of drama)


Congratulations must go to Ravenhill!! Come on down!! (aussie in-joke there relating to a tv game show). Please email me your postal address and the four vintage sewing patterns will be winging their way as soon as they can.

Ravenhill lives all the way over in Norway and has a wonderful blog which showcases her fabulous stitching, her current interest in babushkas and a stupendously cute little gal named Lily. Ravenhill (sorry, can't find your 'real' name anywhere!) left a great comment after my request for apron display techniques... lol... and if the weather goes to plan, you'll see some new ideas and photos soon.

Thankyou all for your wonderful and creative ideas. I plan to put them to crafty use in the next week. I'll keep you updated.

Monday 8 September 2008

Don't forget, vintage pattern giveaway ends tonight!

Yes, you have until 9pm Adelaide time tonight to get your reply in here to be in the running for four vintage children's sewing patterns.

And here is a sneak peek at the late 50's pattern I am using to (shock horror) make something for myself!

Sunday 7 September 2008

Sunday Night Grooves


MixwitMixwit make a mixtapeMixwit mixtapes

Happy Daddy Day!

That's what we have coined as our newest term in our house. Happy Daddy Day. A day, I explained to our 2.5yr old going on 25yrs old, when you appreciate how great your daddy is. And she promptly replied, "Can I have a cake?". Ah, the 2yr old logic is going strong...

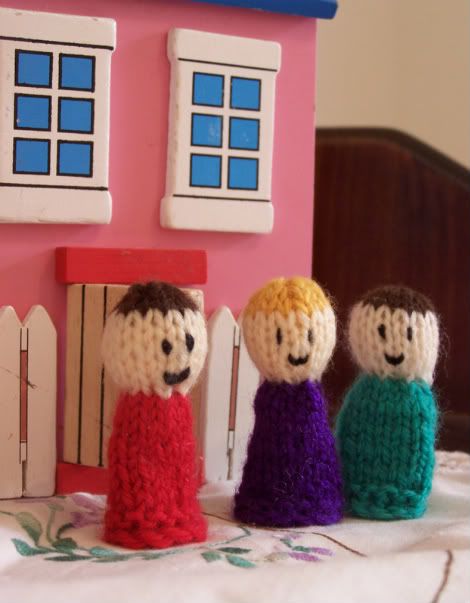
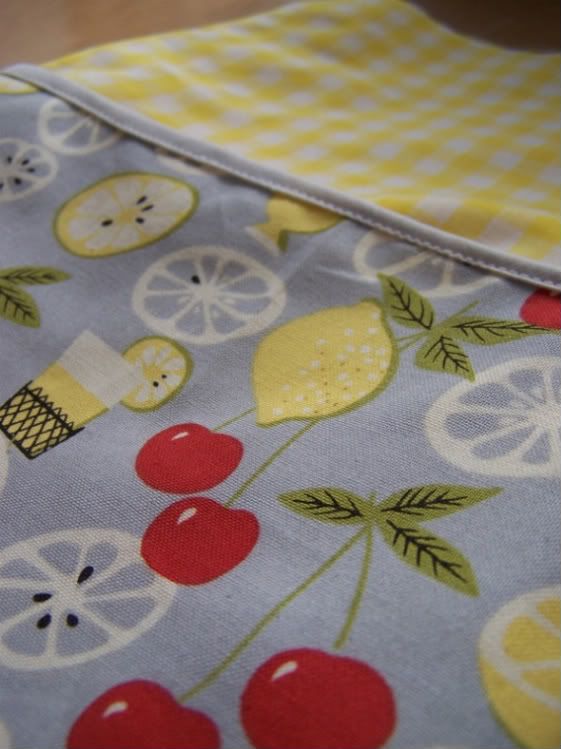
We spent a lovely day at the parent's in law's house eating and drinking and eating some more. I also decided today is the day to make a concerted effort at mastering the macro on my camera. It's been bugging the be-jeepers out of me and I need to master it. Or else I'll keep yelling at it and that ain't good. Here's some a pic from today. I am quite happy with it as it's getting quite close to that close up focus/background blurry look I love.

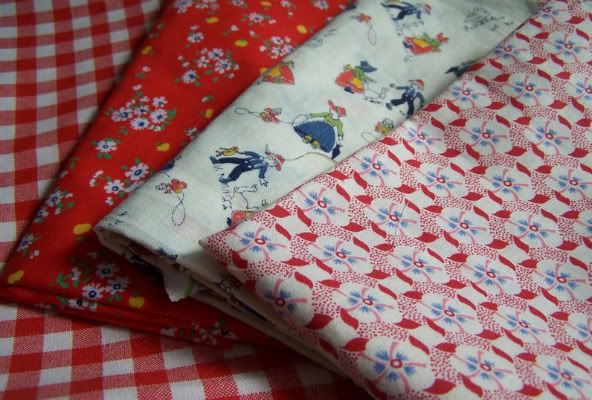
Here is a pic of the Little Bluebirds by Janelle Wind that I have started this week by transferring the stitching outline. My first and most important question is "Who the billy-o has the time and the patience to hand stitch and embroider?????!!". I'm used to being very gung-ho and roaring away with the machine, getting as much done in the small amount of crafting time that I have. But this slow, patient, calm thing.... it's taking a lot of getting used to. Quite meditative really, if I slow down long enough to think about it.....


And if you like the look of these beauties, they are called Raspberry Swirl Cheesecakes and they are DIVINE. I made them for Happy Daddy Day. If you'd like the recipe, check below:

Raspberry Swirl Cheesecakes (makes 12)

1 cup (about 10) finely ground Oreo biscuits (including filling) - (I use my food processor to grind them)
40g unsalted butter, melted
1/2 cup frozen raspberries, thawed
2 tbs icing sugar, sifted
375g cream cheese
1 cup (220g) caster sugar
3 eggs
1 tsp vanilla extract

Preheat oven to 170 degrees C. Line a 12-hole muffin pan with paper cases.

Mix ground Oreos and butter in a bowl. Divide mixture among paper cases, pressing down well. Bake for 5 minutes, then remove and cool.

Mash the raspberries to a pulp with a fork. strain through a sieve into a bowl, pressing down well, then discard seeds (I only mash and don't bother with straining or de-seeding. Life is too short!). Stir in the icing sugar.

Place the cream cheese in bowl of an electric mixer, beat until light and fluffy. Add the caster sugar in a slow, steady stream, beating unitl combined. Add eggs, one at a time, beating well after each addition, then beat in vanilla. Pour cheese mixture over biscuit bases. Place small drops (about 1/2 teaspoon) berry puree on top of cakes and use a wooden skewer to carefully swirl though cheese mixture. Bake for 10 - 15 minutes until just set. Open oven door and allow cakes to cool completely in switched-off oven. (Taken from ABC Delicious magazine, Sept 05)

Thursday 4 September 2008

Exercise = Good Karma

It's a beautiful sunny spring day here in Adelaide and the sunshine inspired me this morning to get out and walk. Of course, a walk is even better if it has a destination, and what better motivation to have to exercise than to be aiming for a local and as yet unexplored op shop!

With my daughter loaded into the pram and many a healthy snack on board, we trundle off and I'm proud to say the round trip was 5.6km's. Wowser! But it gets better.

Look at what we found at the lovely op shop at the half way mark of our trip:

I don't know why I have such an interest and love for vintage children's books, particularly those from the 1950's and 1960's, as I grew up in the 1970's. But these are such fabulous examples. I particularly love 'The Party' which is a Ladybird book which you may remember from your childhood. The 'Bedtime Stories' book has great illustrations that I may frame for my daughter's room. And they were all such very good prices that I gave the lady a little extra out of conscience!

The other thing I'm going to start today is my first block for my new quilt, The Little Bluebirds quilt by Janelle Wind. I received my first pack in the mail yesterday from the very helpful Sarah of Quilt Fabric Delights. Photos tomorrow of my progress. I'm off to sit out in the sunshine and get started. Ah.... spring. Makes me happy.

Wednesday 3 September 2008

Finito! Doll Quilt Swap 4 (DQS4)

I have finally finished and posted off my first doll quilt made for a swap. Not my first quilt, mind you, as I've tackled much larger things in the past and have a couple underway as we speak (does that term apply when you are blogging?).

Here..... (**insert fanfare of medieval trumpets**) is the quilt destined for my swap recipient in Canberra. That's all I can say until the recipient receives her parcel and falls over in hysterics at my wonky quilting!!

I had a great time making this. Researching the pattern, being persuaded (thanks Robyn!) that I didn't have to make the most complicated quilt in the universe nor had the time to do one, selecting fabrics from my overflowing fabric stash. Hand sewing binding on a quilt for the first time. Using my walking foot on my sewing machine for the first time. Using fleece fabric instead of 'proper' quilt batting - waste not, want not. I truly enjoyed being thrifty whilst making this quilt and can proudly say I did not purchase anything for it, just used what I had.

So here's where I hold my breath and wait. Hopefully she'll like it.

It's time for another giveaway


This is what happens when you store all your delicious patterns in an Ikea box that isn't secure at the bottom. I was attempting to find some patterns for this giveaway and when I picked up the box......... the box base gives way and they all decided to launch themselves to the floor, even into the bin! So I take this as the universe telling me I have waaaay too many patterns and it's a good thing I am willing to part with some.

Of course, I have an ulterior motive for this giveaway. I have a dilemma. I can't quite decide how to photograph my children's aprons for my Silly Gilly website. Here is what I currently do:

Not a very exciting photo, but practical nonetheless. I would love to have the apron displayed with a little more pizazz when I photograph it for the website.

Sooo, if you can leave a comment by 9pm Monday 8th September with your idea for a creative and visually appealing way of capturing my aprons, you'll be in the running for this:

From left to right:
Style pattern size 5 - Child's Dress - gently flared bias cut dress. Circa 1976.
Style pattern size 2 - Child's Shirt, Skirt, Trousers or Shorts. Circa 1979.
Butterick pattern size 1 - Easy Toddlers' Pantdress or Pantjumper. Circa late 60's.
Sytle pattern size 2 - Child's Dress or Tunic, Trousers or Shorts. Circa 1972.

All patterns to my knowledge have all the pieces required and all have full instructions included.

If you want an example of how a vintage pattern giveaway can change your life, check out Curlypops' new career as a trouser designer!! She won a Silly Gilly pattern giveaway and hasn't looked back!

Monday 1 September 2008

Look what landed in my garden!

Thanks to a lovely gal called Liz, I am now the very proud owner of this gorgeous bird brooch. You can find more of this loveliness at Betty Jo Designs. Liz hand makes these brooches from vintage linoleum and buttons. Isn't my birdie cute!? She has already been on a couple of outings and is a very well behaved traveler.